Building a frame + stretching and preparing a canvas.
Just like process scribbles and splatters, the making and preparation of the canvas, for me, is an integral element of the finished work .

Utrecht, 4th Ave betw 11th and 12th, nyc
I used (and loved) this Utrecht location since the early 1990’s (it closed about 2012). Not that it would be an option to use at this point anyway but it’s nice to be able to order from Utrecht online now. Brooklyn origin aside, its still got a solid selection and good prices.

Note: I don’t use philips head screws anymore as they seem to strip too easily. I only use star (hex) head screws.

Raw Materials:
For material cost comparison, an 8’ - 2" x 2 (or 2 x 4 but you’ll have to rip it in half) at Home Depot costs around $4 where a 66” stretcher bar from Utrecht (Est.1949, Brooklyn, NY) costs about $24 (these prices are probably somewhat different now but I’d be surprised if the difference isn’t as well . So you can see that even if you buy an 8’ - 2 x 2 and cut it to 66”, it will cost $4 vs $24 for a stretcher bar purchased from Utrecht (I have nothing against the Utrecht bars -in fact I really like them and, cost being similar, would gladly use them…although there is something therapeutic about building them from scratch). And if you need the full 8’ bar from Utrecht, it will cost about $50. Multiply those comparative costs by 4 sides and a 66” square frame will cost $16 vs $98 (or for a 96” square frame, $16 vs $200). I really like the Utrecht bars but not six times more than making a frame myself (or twelve times more for 96”).
• For stretcher bars, use 2x4’s ripped in half (or 2 x 2’s). Chamfer 15 degrees @ canvas face. Ease edge @ canvas face.
• Use #8 - 1 5/8” and 2” T-25 star head (hex head) screws to join together frame - see accompanying photos (I prefer hex head screws as philips head screws seem to strip too easily) .
• Use 1 x 4’s with 45 degree cut ends for corner bracing @ “large” frame sizes (“Smaller” size frames may not require corner braces).
• Use 1 x 4’s (or 1 x 2’s for “smaller” frames) for intermediate bracing. Connect large frame 1 x 4 bracing to perimeter frame with 2” screws - see photos. Use 3” metal tee to connect bracing for smaller frame sizes). Where perpendicular frame bracing intersects, use 3” Metal Tee Braces @ both large and small frames.
• 3/8” or 1/2” staples (for staple gun)
• Stretcher Pliers
• 12 or 15 oz canvas (7oz might be ok for small pictures although I would still use 12oz even for small pictures))
• Sizing + Canvas Primer
• 2” brushes (use separate brushes for sizing and priming)
Tools:
Drill, Table saw, Miter saw, Right Angle corner clamps, Staple Gun
Process:
• If starting out with 2 x 4’s, rip them in half and then proceed with the following instructions. If starting out with pre-cut 2 x 2’s, take them (or the ripped 2 x 4 pieces) and cut one side at an angle on a table saw (blade set to 10-15 degrees) so the stretched canvas does not rub on the bar surface. Ease the edge with a sander so it doesnt rip the canvas.
• Mitre cut the ends of 2 x 2’s to size of finished canvas.
• Using right angle clamps, clamp corners together. Measure the two diagonals. If the dimensions match, then the frame is square. Drill and screw each side of each corner with 1 1/2” #10 or lighter wood screws.
• Depending on the canvas size, intermediate braces are necessary to keep the finished canvas from twisting. A 60” x 40” canvas, probably only needs one cross brace in the center of the 60” length.
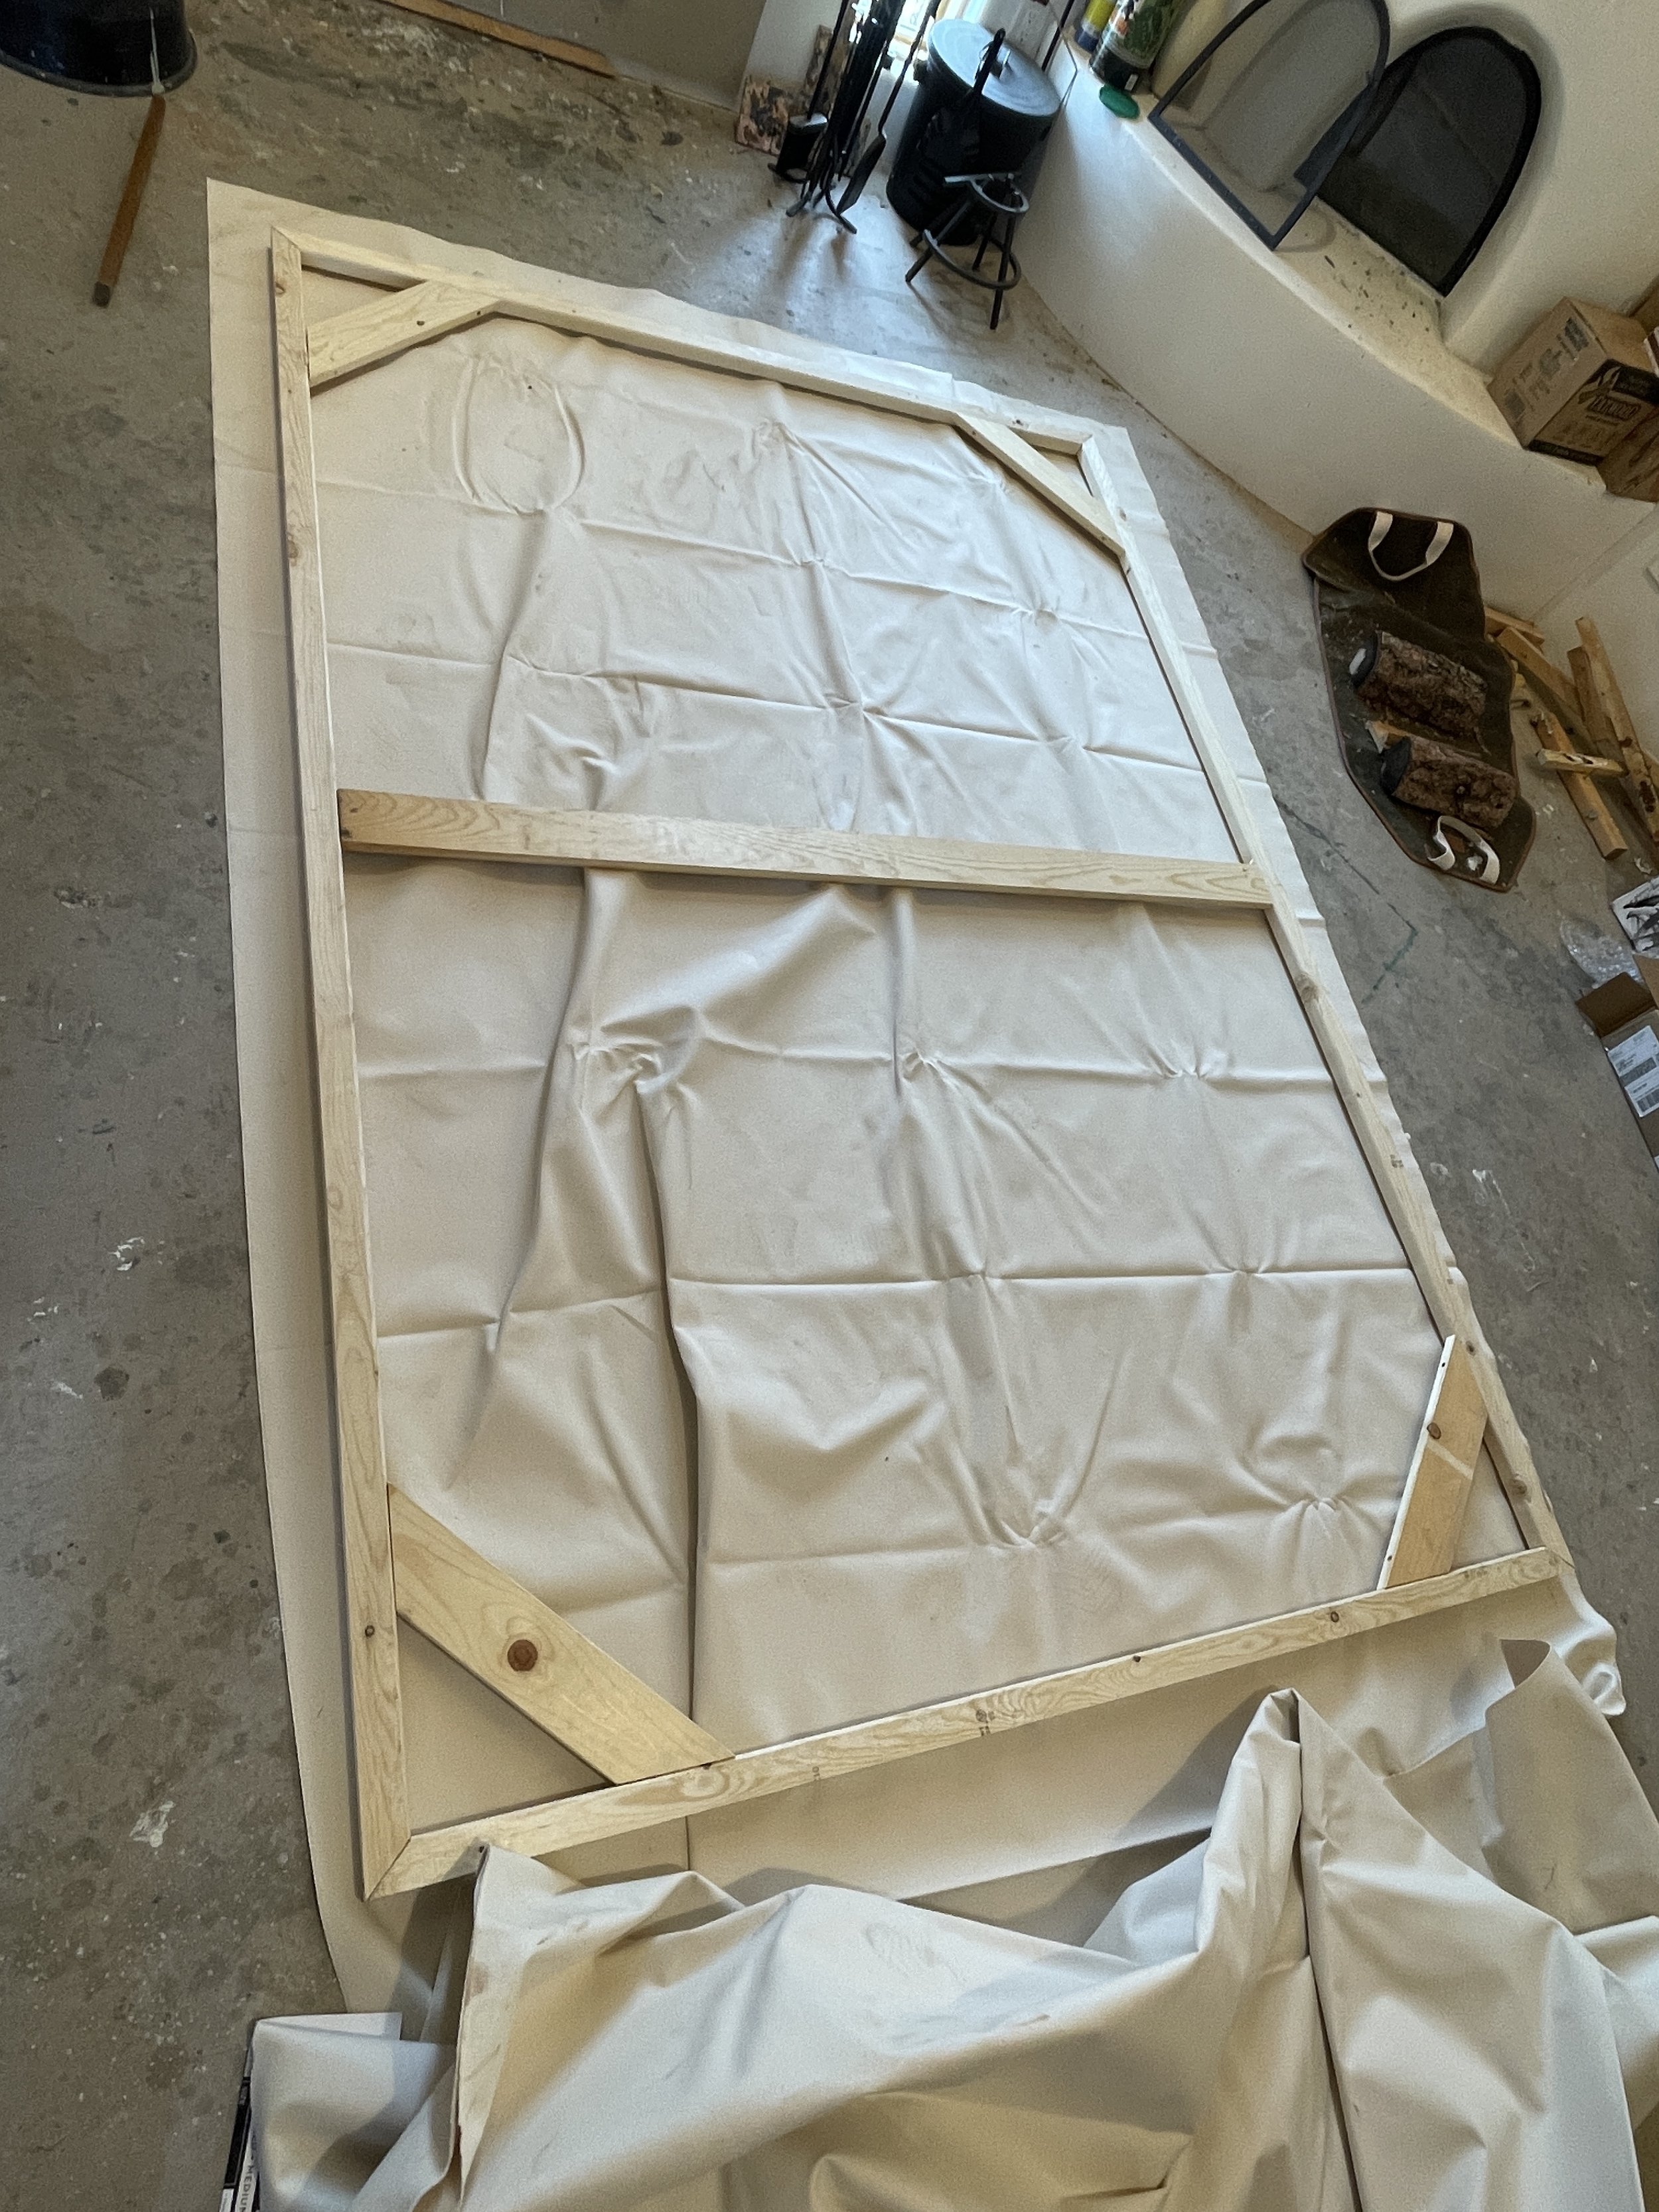
• A 66” x 72” canvas will need a “+” brace (cross brace on each side) OR 1 x 4 corner braces + one intermediate 1 x 4. Use 1 x 2’s or 1 x 4’s aligned with the back of the frame using 3” T braces OR through screwed with 2”, T-25 star screws. The face of the braces should not touch the back of the canvas.
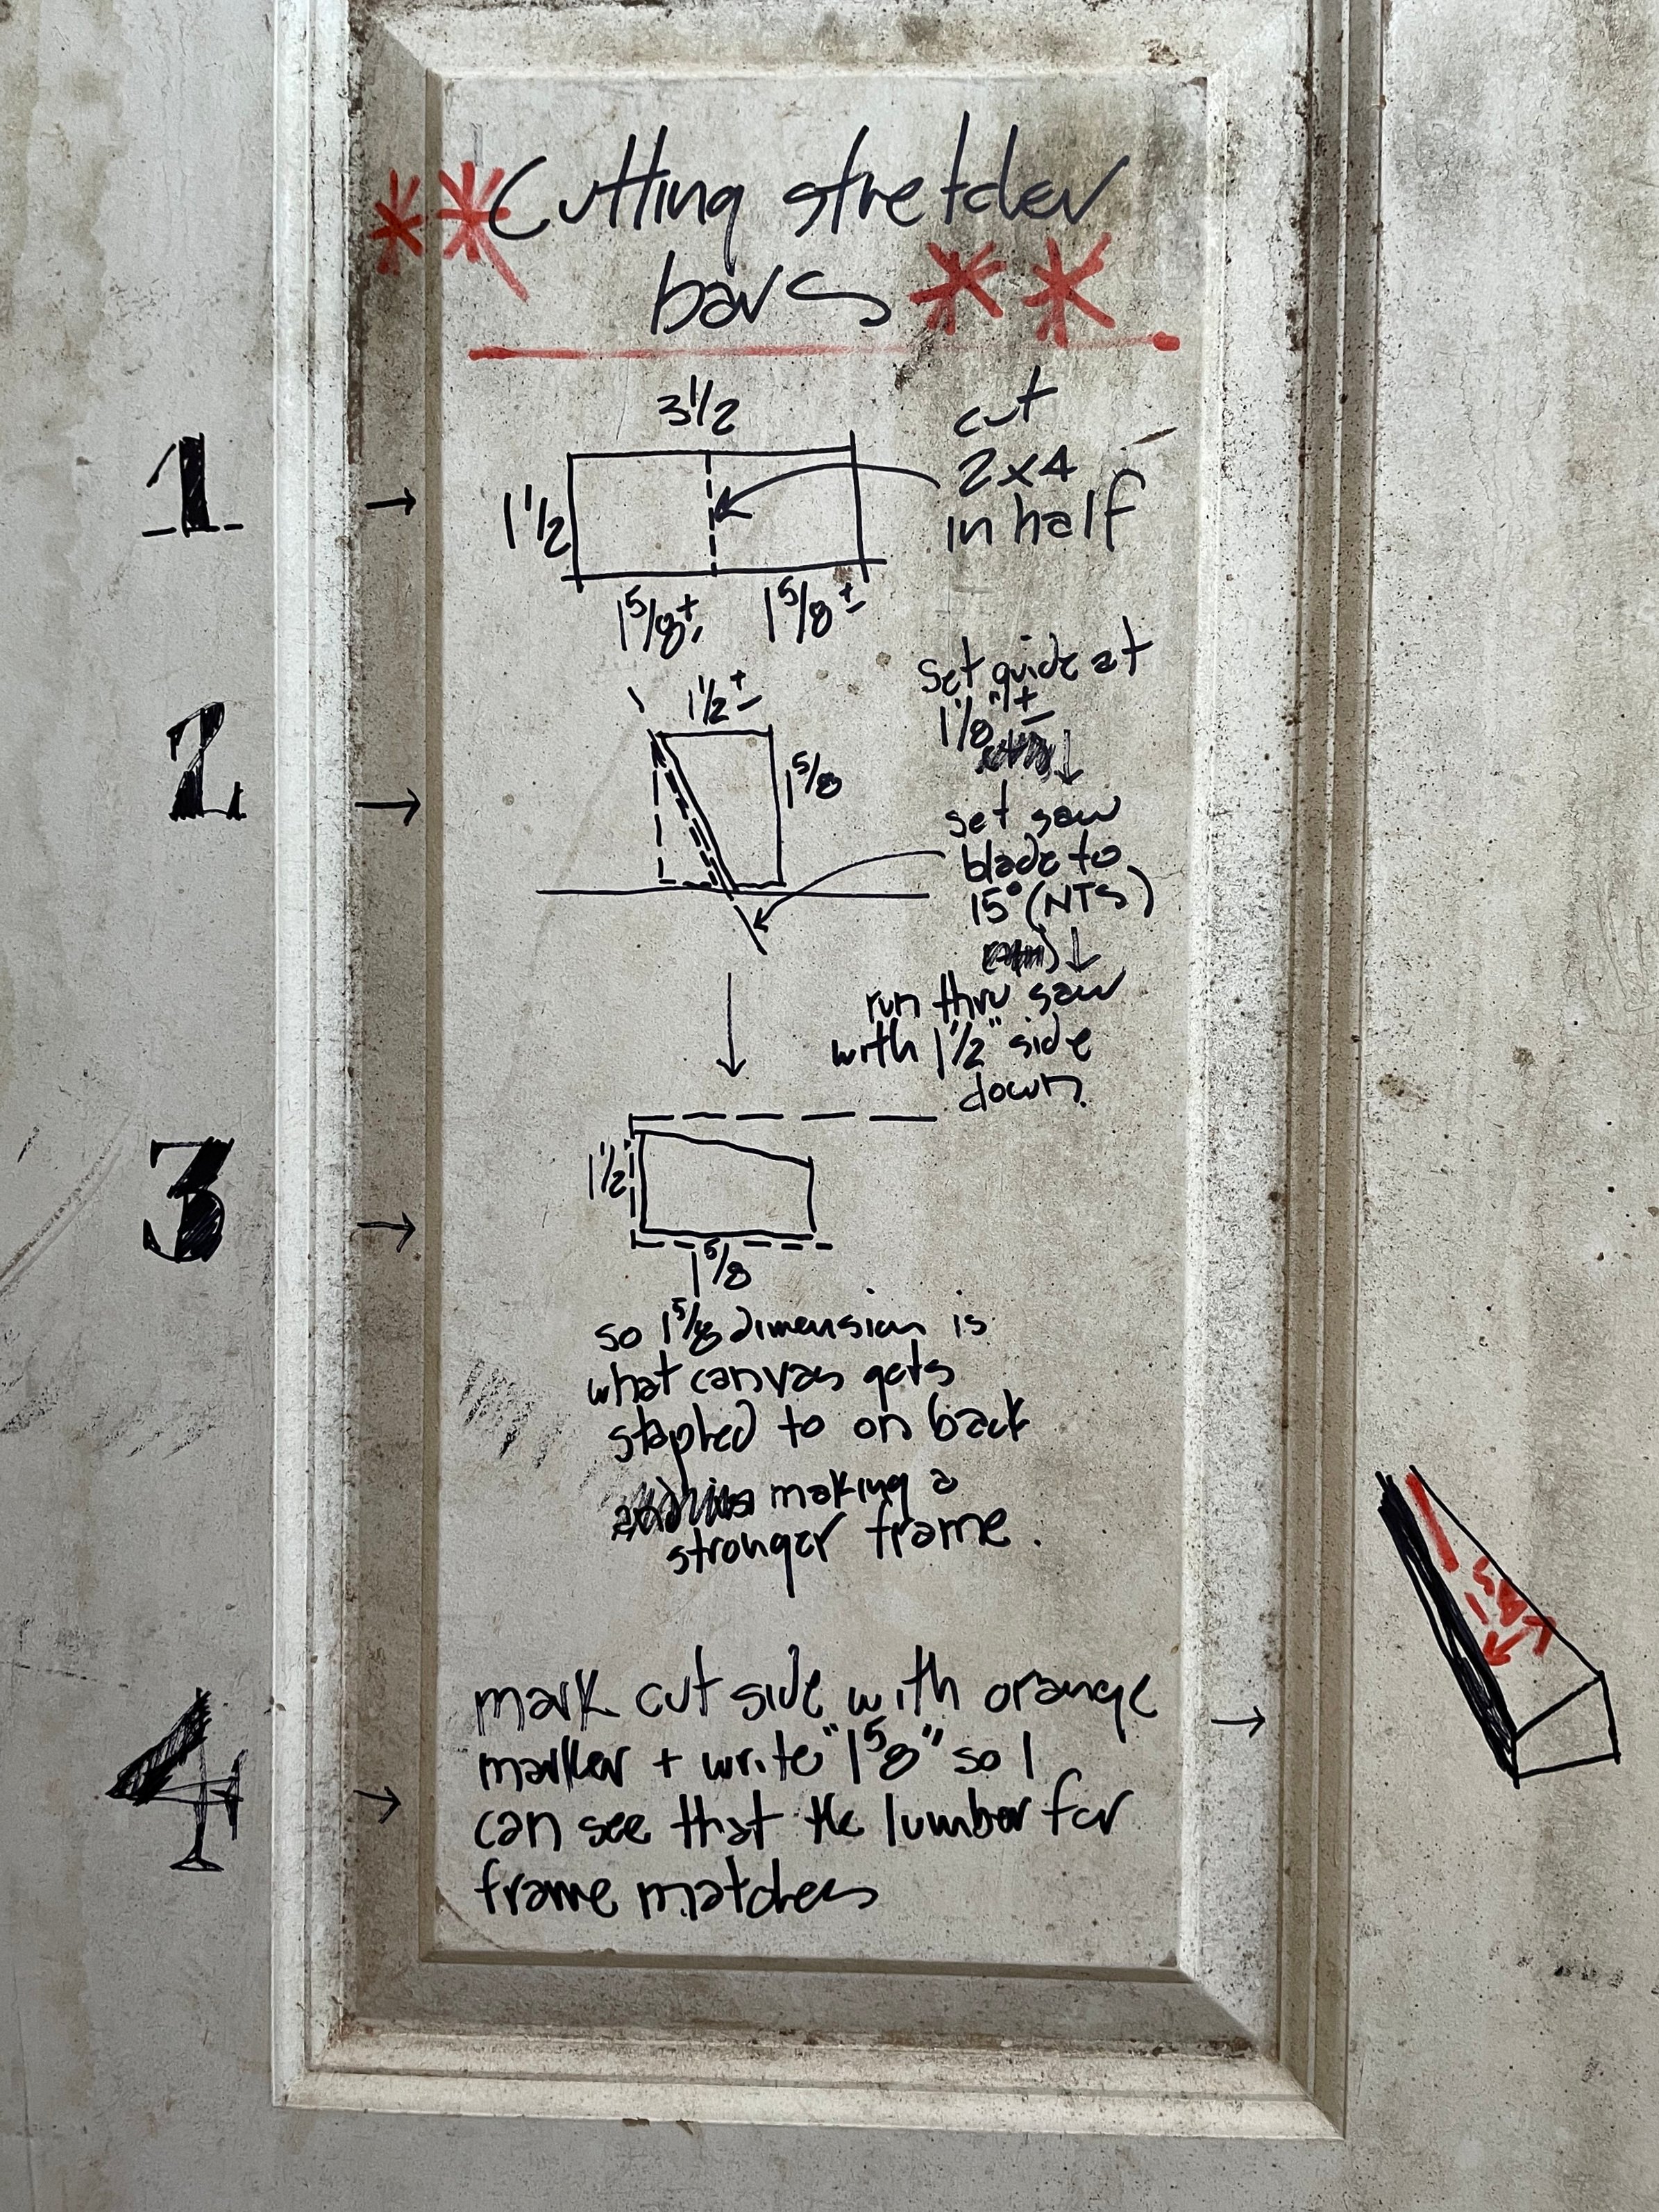
Making the stretcher bars

Mitres frame pieces (dog not included).

Use corner clamps and a large metal angle to verify that corner is square. After all four corners are clamped, verify that the two diagonal frame dimensions match.

Use 3” metal Tee internal intermediate brace(s) connections @ “large” and small” frames (as opposed to connections to perimeter frame - use screw connection @ perimeter for “large” frame sizes).
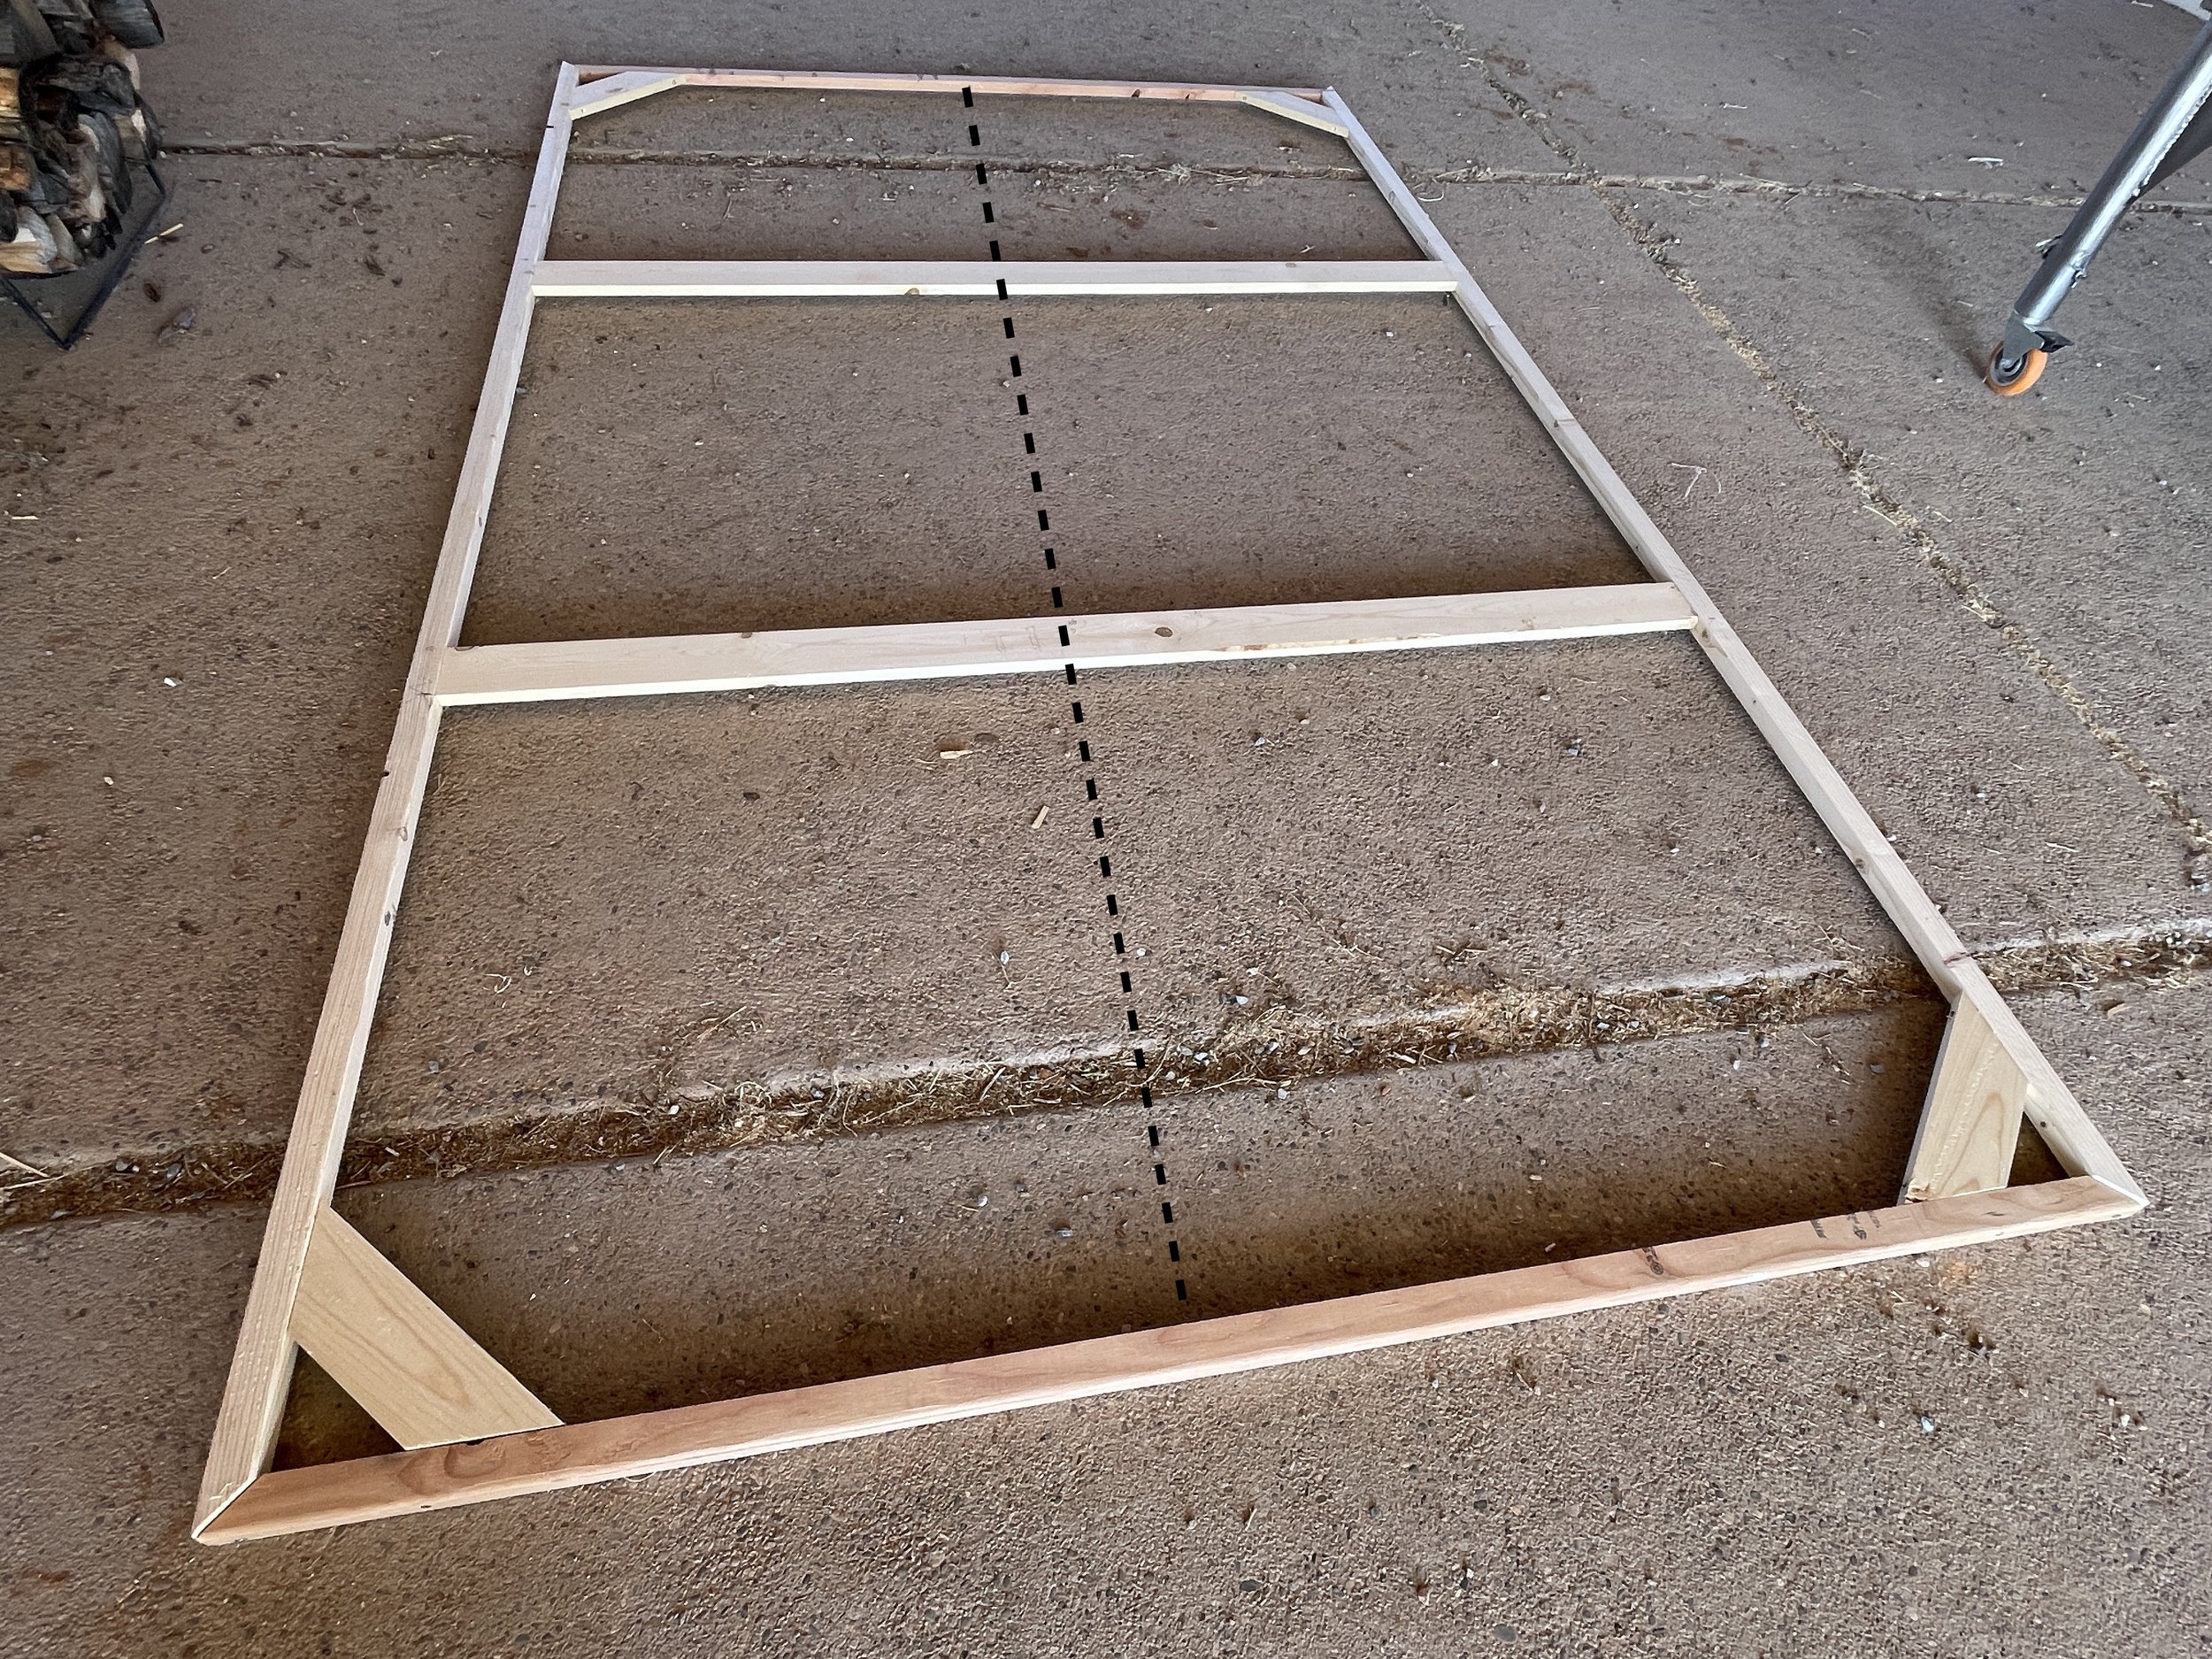
Number of intermediate braces depends on frame size. This frame hangs on the longer dimension.
For “large” size frame that hangs on the shorter frame dimension, provide support from top to bottom (dotted line - this can be a continuous brace or - in this case - 3 intermediate braces connecting to cross pieces.


Corner bracing may not be necessary for “smaller” frame sizes as the stretched canvas may provide sufficient stabilization.


Use of metal tee and 1 x 2 brace may be acceptable for “smaller” frame sizes.
• Use 12oz or 15oz unprimed canvas. Once I made the mistake and bought primed 7oz canvas. Pre-primed is harder to get a nice tight stretch + 7oz is much too light for anything other than small sizes (even small sizes I use 12oz as it feels more substantial than 7oz).
• Using stretcher pliers, stretch canvas onto frame, stapling the middle of each side with ⅜” staples and then gradually working out on alternate sides towards the corners.
This video link shows a decent technique for folding the corners.
• When frame is stapled, “size” the canvas (Utrecht rabbit skin glue and size). This protects the raw canvas from paint oils and tightens the canvas (flick with finger and should should like a drum as well as hold its shape).
• If desired, after the canvas is “sized”, it can be primed with oil priming ground.

Stretcher pliers.